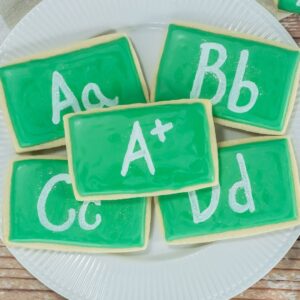
Chalkboard Cookies
A tender sugar cookie topped with green icing to write on.
Equipment
- Measuring Cups
- Measuring Spoons
- Parchment Paper
- Baking Sheet
- Electric mixer
- Rectangle cookie cutter
Ingredients
For the Cookies:
- 1 cup sugar
- 1 cup unsalted butter softened
- 1 egg
- 1 teaspoon vanilla
- 3 cup flour
For the Icing:
- 4 cup powdered sugar divided
- 2 Tablespoons meringue powder
- 2 teaspoons vanilla divided
- ½-¾ cup water divided
- 2 Tablespoons corn syrup
- Green food coloring
For Chalk:
- ¼ cup white chocolate
Instructions
- Preheat the oven to 350 degrees. Line a couple baking sheets with parchment and set aside.
- In the bowl of a stand mixer, combine the softened butter and sugar. Cream until smooth.
- Add in the egg and vanilla and mix to combine, scraping the sides and bottom often
- Add the flour and mix just until combined.
- Transfer the dough to your work surface and knead gently to make sure all ingredients are fully incorporated.
- Lightly flour the work surface and use a rolling pin to roll out the dough to about ⅝ of an inch thickness.
- Use a rectangular cookie cutter to cut out as many rectangles as you’re able. Save the dough and reroll as many times as possible.
- Carefully transfer the cut out cookies to the prepared baking sheets, leaving about ½-1 inch between each cookie. The cookies won't spread much.
- Bake in the preheated oven for 11-12 minutes, just until the edges are slightly browned and the center is set. Do not overbake. Allow to cool completely before decorating.
- For the icing, combine 2 cups of the powdered sugar, 1 teaspoon vanilla and 2 Tablespoons of meringue powder. Mix in about ¼ cup of water and use an electric mixer to mix well for about 2-3 minutes, or until thoroughly combined. Scrape down the sides of the bowl.
- Add the remaining 2 cups of powdered sugar, 1 teaspoon vanilla, 2 Tablespoons corn starch and about ¼ cup of water. Mix until thoroughly combined, scraping down the sides of the bowl as needed.
- Finish mixing the icing by hand. This lets you test the consistency. Add more water a tablespoon at a time to thin out the icing. Or, add more powdered sugar if it's too thin.
- Add the green food coloring and mix until thoroughly combined. If you aren't going to use the icing right away, place plastic wrap over the bowl.
- When ready to decorate, give the icing one final stir and then transfer the icing to a piping bag. Cut a small opening in the piping bag.
- Pipe around the outside edges and then fill in the center of each cookie. If needed, use a toothpick to help spread the icing and to pop any bubbles. Allow the decorated cookies to set for about 12-26 hours for the icing to harden before proceeding.
- For the white chocolate chalk, melt the white chocolate in a microwave safe bowl. Transfer to a piping bag and set aside to cool slightly.
- Cut a few straws into 3 inch size tubes. Place a rubber band around them to keep them tight and upright in a small bowl.
- Cut a small hole in the end of the piping bag and pipe the melted white chocolate into each straw. Allow to set completely.
- To remove the white chocolate from the straws, either unwrap carefully for paper straws, or cut open a plastic straw.
- Very carefully, write the desired message or decoration on the cookies. The white chocolate may crumble a bit but it adds to the theme with the chalk dust you’d see writing on an actual chalkboard. Do not press too hard in order to prevent the white chocolate chalk from breaking and from indenting the icing on the cookie. It's better to take several passes over the icing to darken the chalk.
Notes
Storage: Decorated cookies should be stored in an airtight container for up to 1 week.
Tried this recipe?Let us know how it was!