Easy Chocolate Covered Oreo Pumpkins: Jack O Lantern Treats
Here is a fun little dessert idea that’s perfect for getting into the Halloween spirit without too much fuss. These chocolate covered Oreo pumpkins are decorated to look like Jack O’Lanterns. It’s basically classic Oreos dressed up in bright orange chocolate and topped with cute (or scary) faces. They are super easy to make, and a big hit whether you hand them out for trick or treating, serve at a party, or sell at a school bake sale. Plus, no carving skills required which is a big plus for me!

About Chocolate Covered Oreo Pumpkins
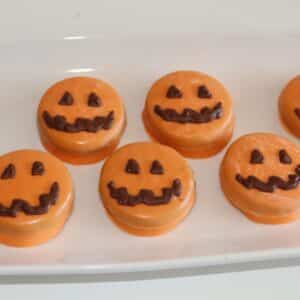
These Oreos aren’t just tasty, they’re visually fun, with bright orange chocolate and Jack O’Lantern faces that instantly scream Halloween, making them great for parties or a school bake sale.
What I love about these chocolate covered Oreo pumpkins is that you don’t need to be a master chocolatier to make them. And, you don’t need to spend hours in the kitchen. Dipping Oreos in chocolate and decorating with melted chocolate is straightforward but nails the cool factor every time.
These chocolate covered Halloween Oreos are perfect for all ages. For kids and adults alike, these treats bring smiles all around. They combine the familiar Oreo crunch with sweet chocolate and a hint of creativity that’s just right for everyone to enjoy.
The Key Ingredients for Oreo Pumpkins

These Jack O’Lantern pumpkins use classic Oreos as the base. If you’re not a fan of the original, you can swap in any sandwich cookie or even a gluten-free version for dietary needs.
Orange candy melts give the Oreos that perfect pumpkin vibe. If you don’t have orange, you can mix white candy melts with a drop of orange food coloring or color white chocolate.
Melted chocolate, or black candy melts are used to make the faces for the Jack O’Lanterns. I kept it simple with just those two colors, but if you want to make stems you can add a dab of green melted chocolate to the top of the chocolate covered Oreo pumpkins.
Tips for Success
These Oreo pumpkins are super easy to make so I don’t have a lot of earth shattering tips for you. But, here are a few tips for having the most success making these chocolate Halloween Oreos.
Tip #1: Use room temperature Oreos
I store my Oreos at room temperature so this is never an issue for me. But if you happen to keep your Oreos in the refrigerator, or a cool space, let them sit for a bit at room temp before dipping. This helps the chocolate stick better and keeps your pumpkins looking smooth without cracking.
Tip #2: Melt the chocolate slowly
Take your time melting the candy melts. Going slow prevents burning, and a smooth chocolate coat is key to making these pumpkins look awesome. You can use a double boiler if you want, but I find it much easier to just use the microwave.
Tip #3: Work quickly but gently
When dipping the Oreos, coat them evenly and let the excess drip off. The chocolate starts to set quickly, so if you have any sprinkles or extra decorations you want to add you need to move quickly and add them before the chocolate sets.
Tip #4: Chill to set
Pop your dipped Oreos into the fridge for a few minutes. This quick chill sets the chocolate while keeping the cookies nice and crunchy.
Storing Halloween Oreos
Store these chocolate covered Oreos in an airtight container at room temperature or in the fridge for up to a week. Keep them away from humidity to avoid any melting or sogginess.
If you have leftovers (which is rare, but hey, maybe), freeze your decorated Oreos in a single layer on parchment paper. Once frozen, transfer to an airtight container or a freezer bag and they will keep for up to 2 months. Thaw at room temperature before serving.
Step by Step With Photos
Line a baking sheet with parchment paper and set aside.
Place the orange melting chocolate in a microwave safe bowl and heat in 30 second intervals, stirring between each interval until chocolate is smooth. Dip each Oreo into the orange chocolate to fully coat it. Let excess chocolate drip off, and then place the Oreo on the prepared baking sheet. Repeat with as many Oreos as you’d like then let the Oreos rest until the chocolate has set.

While the orange chocolate is hardening, melt the dark chocolate needed to draw the Jack O’Lantern faces. Follow the same process outlined above for melting the chocolate. Microwave for 30 second intervals until smooth, then transfer the melted chocolate to a piping bag. Snip a small hole in the tip of the bag and draw a Jack O Lantern face on each of the Oreos. Have fun making different faces in whatever style you’d like. You can go with cute, scary, or silly.


Let the chocolate faces harden before storing the chocolate covered Oreos in an airtight container. They will keep for at least a week. If you need to make a lot for a bake sale or event, you can freeze the Oreos for up to 2 months.
These chocolate covered Oreo pumpkins are a no-pressure way to enjoy a little Halloween crafting that tastes as good as it looks. They’re a sweet treat with zero mess and a bit of playful spirit, making snack time or party prep a lot more fun. Next time you want something festive but easy, remember these pumpkins. The perfect treat to celebrate Halloween.

Need more ideas for Halloween treats to make? These Spiderweb Brownies are an easy dessert for the holiday. Or how about these Peanut Butter Spider cookies.
If you try this Chocolate Covered Oreo Pumpkins recipe, or any other recipe on my blog, please leave a 🌟 star rating and tell me how it went in the 📝 comments below. Thanks for visiting and happy baking!
Jack O’Lantern Chocolate Covered Oreos
Equipment
- Parchment Paper
- 1 Baking Sheet
- 1 Piping Bag
- 2 Microwave Safe bowls
Ingredients
- Oreos
- Orange Melting Chocolate
- Chocolate or Dark Candy Melts
- Piping Bag
Instructions
- Start by placing parchment paper on a cookie sheet and set aside.
- Place the orange melting chocolate into a microwave safe bowl and melt in 30 second increments, stirring after each. Once melted, completely coat the cookie in chocolate, being sure to shake off any excess. Place on the prepared baking sheet.
- Continue with the desired amount of cookies and then let dry.
- Place the chocolate, or dark melting chocolate, into a microwave safe bowl and melt in 30 second increments, stirring after each. Once melted, spoon into piping bag and cut off the tip.
- Pipe a pumpkin face onto the chocolate covered Oreos. Continue with the all of the cookies and then set aside to let chocolate set.
- Once the chocolate has set, the Oreos can be store in an airtight container at room temperature. Place them in a single layer, with parchment paper on top if you need a second layer.
Notes
- The Oreos may be frozen for up to 2 months. Bring the cookies to room temperature before serving.
Follow me on Pinterest for more fun and easy cookie recipes to make for any occasion. And if you try this recipe, be sure to leave a comment and let me know how it went.

- Red Velvet Blossom Cookies Recipe: Festive and Easy to Make - February 18, 2026
- Baileys Irish Cream Cookie Recipe: Fun Leprechaun Hats - February 4, 2026
- Easy Flourless Chocolate Tart Recipe: A Gluten-Free Treat - January 29, 2026